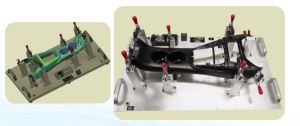
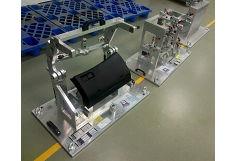
In the manufacturing industry, checking fixtures play a crucial role in ensuring the quality and precision of parts. As a dedicated checking fixtures supplier, I understand the significance of the calibration process for these essential tools. This blog post aims to delve into the calibration process for checking fixtures, shedding light on its importance, steps, and best practices.
Importance of Calibration
Calibration is the process of comparing a measuring instrument or device, in this case, a checking fixture, against a known standard to determine its accuracy. For checking fixtures, calibration is vital for several reasons. Firstly, it ensures that the fixture provides accurate and reliable measurements. In manufacturing, even the slightest deviation can lead to defective parts, which can result in costly recalls, production delays, and damage to a company's reputation. By regularly calibrating checking fixtures, manufacturers can maintain the quality of their products and meet the strict standards of the industry.
Secondly, calibration helps to comply with regulatory requirements. Many industries, such as automotive, aerospace, and medical, have specific regulations regarding the accuracy and traceability of measuring equipment. Regular calibration of checking fixtures ensures that manufacturers meet these requirements, avoiding potential legal issues and penalties.
The Calibration Process
The calibration process for checking fixtures typically involves several steps, which are outlined below:
Step 1: Planning
Before starting the calibration process, it is essential to develop a detailed plan. This plan should include the scope of the calibration, the frequency of calibration, the standards to be used, and the personnel responsible for the calibration. The scope of the calibration should define which features of the checking fixture will be calibrated and the tolerance limits for each feature. The frequency of calibration depends on various factors, such as the usage of the fixture, the environment in which it is used, and the manufacturer's recommendations.


Step 2: Preparation
Once the plan is in place, the next step is to prepare the checking fixture for calibration. This involves cleaning the fixture to remove any dirt, debris, or contaminants that could affect the accuracy of the measurements. It is also important to inspect the fixture for any signs of damage or wear and tear. If any issues are found, they should be repaired or replaced before proceeding with the calibration.
Step 3: Selection of Standards
The accuracy of the calibration depends on the quality of the standards used. Therefore, it is crucial to select appropriate standards that are traceable to national or international standards. These standards should have a known accuracy and uncertainty that is suitable for the calibration of the checking fixture. Common standards used for checking fixture calibration include gauge blocks, master parts, and reference fixtures.
Step 4: Measurement
The measurement phase is the core of the calibration process. During this step, the checking fixture is compared against the selected standards using appropriate measuring equipment, such as coordinate measuring machines (CMMs), calipers, or micrometers. The measurements are taken at multiple points on the fixture to ensure that all features are accurately calibrated. The results of the measurements are recorded, including the measured values, the tolerance limits, and any deviations from the standards.
Step 5: Evaluation
Once the measurements are completed, the next step is to evaluate the results. This involves comparing the measured values against the tolerance limits specified in the calibration plan. If the measured values are within the tolerance limits, the checking fixture is considered to be calibrated. However, if the measured values exceed the tolerance limits, the fixture needs to be adjusted or repaired to bring it back into calibration.
Step 6: Adjustment and Repair
If the checking fixture is found to be out of calibration, the necessary adjustments or repairs should be made. This may involve adjusting the fixtures' components, such as pins, bushings, or clamps, or replacing worn-out parts. After the adjustments or repairs are made, the fixture should be re-measured to ensure that it is now within the tolerance limits.
Step 7: Documentation
Finally, it is essential to document the calibration process and the results. This documentation should include the calibration plan, the measurement results, the evaluation of the results, and any adjustments or repairs made to the fixture. The documentation serves as a record of the calibration and provides evidence of compliance with regulatory requirements. It also helps to track the performance of the checking fixture over time and identify any trends or issues that may require further attention.
Best Practices for Calibration
To ensure the accuracy and reliability of the calibration process, it is important to follow some best practices. These include:
- Use of Trained Personnel: Calibration should be performed by trained and qualified personnel who have a good understanding of the calibration process and the measuring equipment used.
- Regular Maintenance: Checking fixtures should be regularly maintained to ensure their proper functioning and accuracy. This includes cleaning, lubricating, and inspecting the fixtures on a regular basis.
- Environmental Control: The calibration environment should be controlled to minimize the effects of temperature, humidity, and vibration on the measuring equipment and the checking fixture.
- Traceability: All standards used in the calibration process should be traceable to national or international standards to ensure the accuracy and reliability of the calibration results.
- Calibration Records: Detailed calibration records should be maintained for each checking fixture, including the calibration date, the results of the calibration, and any adjustments or repairs made.
Conclusion
As a Checking Fixture Manufacturer, we understand that the calibration process for checking fixtures is a critical aspect of ensuring the quality and precision of parts in the manufacturing industry. By following a systematic calibration process and adhering to best practices, manufacturers can maintain the accuracy and reliability of their checking fixtures, resulting in high-quality products and increased customer satisfaction.
If you are in the market for high-quality checking fixtures or need assistance with the calibration of your existing fixtures, we invite you to explore our range of Checking Fixture And Gages. We also offer specialized Gauges/Checking Fixtures For A/B/C Pillar /Auto Pillar Parts to meet the unique needs of the automotive industry. Contact us today to discuss your requirements and let us help you find the perfect solution for your manufacturing needs.
References
- ASME B89.1.12 - Standard for Dimensional Measurement of Coordinate Measuring Machines (CMMs)
- ISO 10360 - Geometrical product specifications (GPS) -- Acceptance and reverification tests for coordinate measuring machines (CMMs)
- NIST Handbook 44 - Specifications, Tolerances, and Other Technical Requirements for Weighing and Measuring Devices


