As a supplier of Robotic MIG Weld Fixtures, I understand the importance of maintaining these fixtures to ensure optimal performance and longevity. Over time, certain parts of a Robotic MIG Weld Fixture may become worn out due to continuous use, high - stress operations, or exposure to harsh welding environments. In this blog, I will guide you through the process of replacing the worn - out parts of a Robotic MIG Weld Fixture.
Step 1: Identify the Worn - Out Parts
The first step in replacing worn - out parts is to accurately identify them. Regular inspections of the Robotic MIG Weld Fixture are crucial. Look for signs of wear such as excessive abrasion, cracks, deformation, or loose connections. For example, the electrode nozzles may show signs of wear from the high - temperature arc and the flow of shielding gas. The clamping mechanisms can also become worn, leading to reduced holding force. Check the guides and rails that the robotic arm moves along; if they are worn, the movement of the robot may become inaccurate.
Step 2: Gather the Necessary Tools
Once you have identified the worn - out parts, gather the tools required for the replacement. The tools needed can vary depending on the specific part being replaced. For simple tasks like replacing an electrode nozzle, you may only need a pair of pliers or a specialized nozzle removal tool. However, if you are replacing more complex components such as a servo - motor or a sensor, you will likely need a set of wrenches, screwdrivers, and possibly a multimeter to test electrical connections. Make sure all tools are in good working condition and are appropriate for the task at hand.
Step 3: Procure the Replacement Parts
As a Robotic MIG Weld Fixture supplier, I can attest to the importance of using high - quality replacement parts. Inferior parts can lead to sub - standard performance and may even cause damage to the fixture. When procuring replacement parts, ensure they are compatible with your specific Robotic MIG Weld Fixture model. You can refer to the fixture's manual or contact the manufacturer for guidance. If you need to purchase parts from a third - party supplier, make sure they have a good reputation for quality. For example, if you are looking for a new welding torch, choose one that is designed to work with your fixture's power source and welding parameters.
Step 4: Power Down and Isolate the Fixture
Before starting any replacement work, it is essential to power down the Robotic MIG Weld Fixture and isolate it from the power source. This is a critical safety measure to prevent electrical shock and other accidents. Follow the proper shutdown procedures outlined in the fixture's manual. In some cases, you may also need to disconnect the gas supply if the part being replaced is related to the gas delivery system.
Step 5: Remove the Worn - Out Part
Once the fixture is powered down and isolated, carefully remove the worn - out part. Start by removing any fasteners such as screws or bolts that are holding the part in place. Use the appropriate tools and be gentle to avoid causing additional damage to the fixture or surrounding components. If the part is connected by electrical wires or hoses, make sure to label the connections correctly so that you can reconnect them properly later. For example, if you are removing a proximity sensor, note which wire corresponds to which terminal.
Step 6: Install the Replacement Part
After removing the worn - out part, it's time to install the new one. Make sure the replacement part is clean and free of any debris. Align the part correctly with the mounting points on the fixture. Insert any fasteners and tighten them to the recommended torque specifications. If there are electrical or hydraulic connections, reconnect them following the labels you made during the removal process. Double - check all connections to ensure they are secure. For instance, when installing a new welding gun, ensure that the gas and power connections are tight and leak - free.
Step 7: Test the Fixture
Once the replacement part is installed, it's time to test the Robotic MIG Weld Fixture. First, restore the power and gas supply (if applicable) following the proper startup procedures. Run a series of test welds or perform a functional test of the fixture to ensure that the new part is working correctly. Check for any abnormal noises, vibrations, or malfunctions. If the fixture does not perform as expected, re - check the installation of the replacement part and the connections. You may need to make some adjustments or troubleshoot the issue further.
Step 8: Document the Replacement
After successfully replacing the worn - out part and testing the fixture, it is important to document the replacement. Keep a record of the part that was replaced, the date of replacement, and any observations or issues encountered during the process. This documentation can be useful for future maintenance and troubleshooting. It can also help you track the maintenance history of the fixture and plan for future part replacements.
Importance of Regular Maintenance
Regularly replacing worn - out parts is just one aspect of maintaining a Robotic MIG Weld Fixture. A comprehensive maintenance program can significantly extend the lifespan of the fixture and improve its performance. By keeping the fixture in good condition, you can reduce downtime, improve the quality of welds, and ultimately save on costs. For example, regular lubrication of moving parts can prevent excessive wear and tear, and cleaning the fixture can prevent the buildup of welding spatter and other contaminants.
Related Products and Solutions
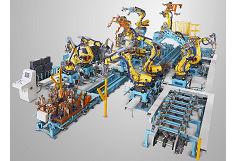
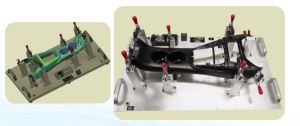
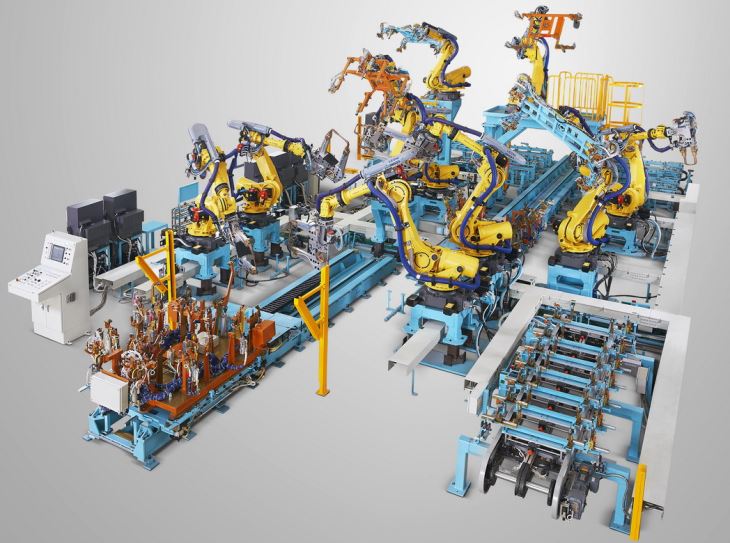
As a supplier, we offer a wide range of products and solutions related to Robotic MIG Weld Fixtures. Our Robotic Welding Fixture Line provides a comprehensive solution for automated welding operations. It is designed to be highly flexible and can be customized to meet the specific needs of different industries. Additionally, our Auto Pillar Parts Welding Fixture is specifically tailored for the automotive industry, ensuring precise and efficient welding of pillar parts.
Conclusion
Replacing the worn - out parts of a Robotic MIG Weld Fixture is a crucial task that requires careful planning and execution. By following the steps outlined in this blog, you can ensure that the replacement process is carried out safely and effectively. Remember to use high - quality replacement parts, perform regular maintenance, and document all maintenance activities. If you have any questions or need assistance with replacing parts or maintaining your Robotic MIG Weld Fixture, please feel free to contact us. We are here to help you keep your welding operations running smoothly. Whether you are a small - scale workshop or a large - scale manufacturing facility, our team of experts can provide you with the support and products you need. Contact us today to discuss your specific requirements and start improving the performance of your Robotic MIG Weld Fixture.
References
- Welding Fixture Handbook: A comprehensive guide to the design, operation, and maintenance of welding fixtures.
- Manufacturer's Manuals: The official manuals provided by the Robotic MIG Weld Fixture manufacturer, which contain detailed information about the fixture's components, maintenance procedures, and replacement parts.