Optimizing the use of an A Pillar welding fixture is crucial for achieving high - quality welds, improving production efficiency, and reducing costs in the automotive manufacturing industry. As a leading supplier of A Pillar welding fixtures, I have witnessed firsthand the impact that proper fixture optimization can have on the overall welding process. In this blog, I will share some key strategies and best practices to help you make the most of your A Pillar welding fixture.
Understanding the A Pillar Welding Fixture
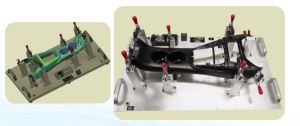
Before diving into optimization techniques, it's important to have a clear understanding of what an A Pillar welding fixture is and its role in the welding process. The A Pillar is a critical structural component of a vehicle, located on either side of the windshield at the front of the car. The welding fixture is a specialized tool designed to hold the A Pillar components in place during the welding operation, ensuring precise alignment and consistent weld quality.
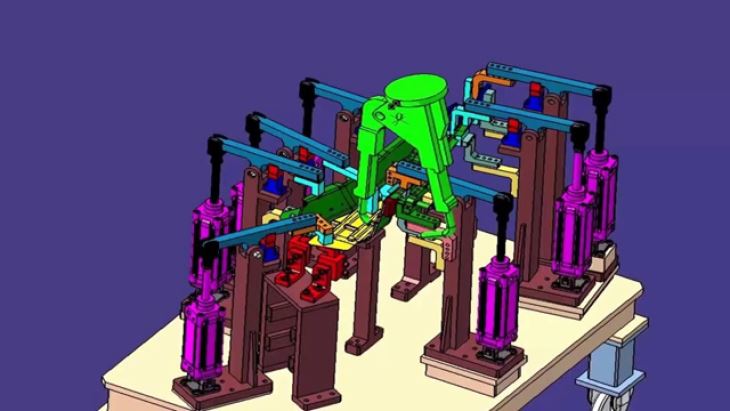
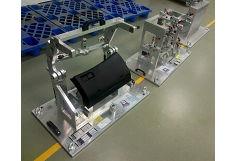
Our Auto Pillar Parts Welding Fixture is engineered with high - precision mechanisms and materials to meet the demanding requirements of automotive manufacturing. It features adjustable clamps,定位 pins, and other fixtures to secure the A Pillar parts accurately, allowing for efficient and reliable welding.
1. Proper Installation and Setup
The first step in optimizing the use of an A Pillar welding fixture is to ensure its proper installation and setup. A poorly installed fixture can lead to misalignment, inconsistent welds, and even damage to the fixture itself.
- Leveling and Alignment: Make sure the fixture is installed on a flat and stable surface. Use leveling tools to ensure that the fixture is perfectly horizontal and aligned with the welding equipment. This will prevent any unnecessary stress on the fixture during the welding process and ensure accurate positioning of the A Pillar components.
- Calibration: Regularly calibrate the fixture to ensure that all its components are functioning correctly. Check the position of the clamps,定位 pins, and other fixtures to ensure they are in the correct position. Any deviation from the specified measurements can lead to welding defects.
2. Material Selection and Handling
The choice of materials for the A Pillar components and how they are handled can significantly impact the performance of the welding fixture.
- Material Compatibility: Ensure that the materials used for the A Pillar components are compatible with the fixture. Different materials may have different thermal expansion rates, which can cause the components to shift during the welding process. Choose materials that have similar properties to minimize any potential issues.
- Cleanliness: Keep the A Pillar components clean before placing them in the fixture. Any dirt, grease, or debris on the components can affect the quality of the welds. Use appropriate cleaning methods to remove any contaminants from the components.
- Proper Handling: Handle the A Pillar components with care to avoid any damage or deformation. Rough handling can cause the components to be out of shape, which will make it difficult for the fixture to hold them accurately.
3. Welding Parameter Optimization
Optimizing the welding parameters is essential for achieving high - quality welds and maximizing the efficiency of the A Pillar welding fixture.
- Welding Current and Voltage: Adjust the welding current and voltage according to the thickness and material of the A Pillar components. Too high a current or voltage can cause excessive heat, leading to distortion and poor weld quality. Too low a current or voltage may result in incomplete welds.
- Welding Speed: Control the welding speed to ensure that the welds are uniform and consistent. A too - fast welding speed may not allow enough time for the weld to penetrate the components, while a too - slow welding speed can cause overheating and distortion.
- Gas Shielding: Use the appropriate gas shielding for the welding process. Gas shielding helps to protect the weld from oxidation and other contaminants, improving the quality of the weld. Adjust the gas flow rate according to the welding parameters and the size of the weld.
4. Maintenance and Inspection
Regular maintenance and inspection of the A Pillar welding fixture are necessary to ensure its long - term performance and reliability.
- Cleaning: Clean the fixture regularly to remove any welding spatter, dirt, or debris. Use appropriate cleaning agents and tools to avoid damaging the fixture.
- Lubrication: Lubricate the moving parts of the fixture, such as the clamps and定位 pins, to ensure smooth operation. This will prevent any wear and tear and extend the lifespan of the fixture.
- Inspection: Conduct regular inspections of the fixture to check for any signs of damage or wear. Look for cracks, loose parts, or any other issues that may affect the performance of the fixture. Replace any damaged parts immediately to prevent further problems.
5. Operator Training
Well - trained operators are essential for optimizing the use of an A Pillar welding fixture. Provide comprehensive training to your operators on how to use the fixture correctly, including installation, setup, operation, and maintenance.
- Training Programs: Develop training programs that cover all aspects of the A Pillar welding fixture. Include theoretical knowledge as well as practical hands - on training.
- Safety Training: Emphasize safety during the training process. Teach the operators how to handle the fixture and the welding equipment safely to prevent any accidents or injuries.
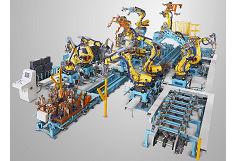
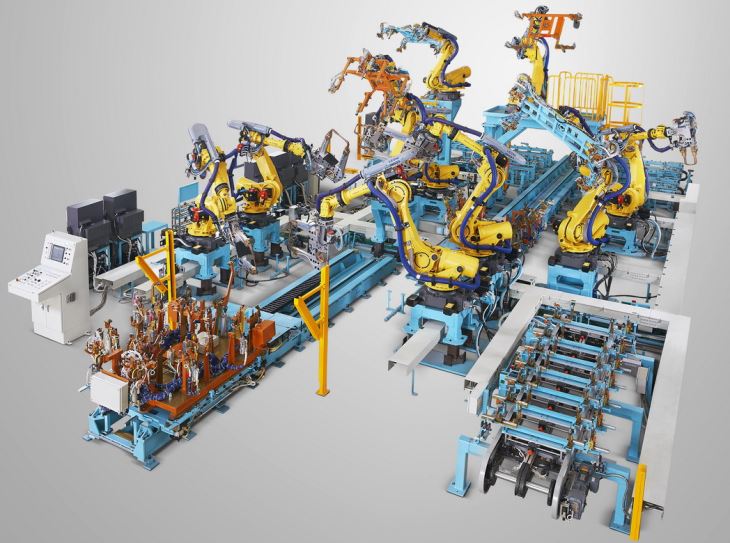
6. Integration with Robotic Welding Systems
In modern automotive manufacturing, many A Pillar welding operations are performed using robotic welding systems. Integrating the A Pillar welding fixture with a robotic welding system can further improve the efficiency and quality of the welding process.
Our Robotic Welding Fixture Line is designed to be compatible with various robotic welding systems. It allows for seamless integration, enabling the robot to accurately position and weld the A Pillar components.
- Programming: Program the robotic welding system to work in conjunction with the fixture. The program should take into account the position of the fixture, the welding parameters, and the movement of the robot.
- Communication: Ensure that there is proper communication between the robotic welding system and the fixture. This will allow for real - time monitoring and adjustment of the welding process.
Conclusion
Optimizing the use of an A Pillar welding fixture is a multi - faceted process that requires attention to detail, proper installation and setup, material selection and handling, welding parameter optimization, maintenance and inspection, operator training, and integration with robotic welding systems. By following these strategies and best practices, you can improve the quality of your welds, increase production efficiency, and reduce costs.
If you are interested in learning more about our A Pillar welding fixtures or would like to discuss your specific requirements, please feel free to contact us for a procurement negotiation. We are committed to providing you with the best - in - class welding fixtures and solutions to meet your automotive manufacturing needs.
References
- Automotive Welding Handbook.
- Welding Technology and Applications.
- Best Practices in Automotive Manufacturing.