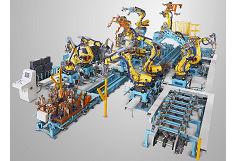
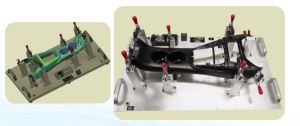
As a supplier of auto door CMM holding jigs, I've witnessed firsthand the critical role these fixtures play in the automotive manufacturing process. Coordinate Measuring Machine (CMM) holding jigs are essential for accurately measuring the dimensions of auto door parts, ensuring they meet the strict quality standards required in the industry. However, achieving high accuracy with these jigs is not always straightforward, as several factors can significantly impact their performance. In this blog post, I'll explore the key factors that affect the accuracy of an auto door CMM holding jig and discuss how to mitigate their effects.
Material Selection
The choice of material for the CMM holding jig is crucial, as it directly influences the jig's stability, durability, and thermal properties. Materials with high stiffness and low thermal expansion coefficients are preferred, as they can maintain their shape and dimensions under varying temperature conditions. Common materials used for auto door CMM holding jigs include aluminum, steel, and composite materials.


Aluminum is a popular choice due to its lightweight, high strength-to-weight ratio, and good corrosion resistance. It also has a relatively low thermal expansion coefficient, which helps to minimize dimensional changes caused by temperature fluctuations. However, aluminum is softer than steel, which means it may be more prone to wear and deformation over time.
Steel, on the other hand, is known for its high strength, hardness, and wear resistance. It is less likely to deform under heavy loads or repeated use, making it a suitable choice for applications where high precision and durability are required. However, steel is heavier than aluminum and has a higher thermal expansion coefficient, which can pose challenges in maintaining dimensional accuracy in environments with significant temperature variations.
Composite materials, such as carbon fiber reinforced polymers (CFRP), offer a unique combination of high strength, low weight, and excellent thermal stability. They have a very low thermal expansion coefficient, which makes them ideal for applications where temperature changes are a concern. Additionally, composite materials can be tailored to have specific mechanical properties, allowing for the design of jigs that are optimized for a particular application. However, composite materials are generally more expensive than aluminum or steel, and their manufacturing process can be more complex.
Design and Manufacturing Tolerances
The design and manufacturing tolerances of the CMM holding jig also play a significant role in its accuracy. Tolerances refer to the allowable variation in the dimensions of a part or component. Tighter tolerances generally result in higher accuracy, but they also increase the cost and complexity of manufacturing.
When designing an auto door CMM holding jig, it is important to consider the specific requirements of the measurement process. The jig should be designed to securely hold the auto door part in place, ensuring that it is properly aligned with the CMM probe. The design should also minimize the number of contact points between the jig and the part, as excessive contact can introduce measurement errors due to friction and deformation.
During the manufacturing process, strict quality control measures should be implemented to ensure that the jig meets the specified tolerances. This may involve using precision machining techniques, such as CNC milling and turning, and performing regular inspections and measurements using calibrated instruments. Any deviations from the design specifications should be corrected immediately to ensure the accuracy of the jig.
Environmental Conditions
Environmental conditions, such as temperature, humidity, and vibration, can have a significant impact on the accuracy of an auto door CMM holding jig. Temperature changes can cause the jig and the auto door part to expand or contract, leading to dimensional variations. Humidity can also affect the dimensional stability of the jig, especially if it is made of materials that are prone to moisture absorption. Vibration can introduce measurement errors by causing the jig and the part to move or vibrate during the measurement process.
To minimize the effects of environmental conditions, it is important to control the temperature and humidity in the measurement environment. This can be achieved by using climate control systems, such as air conditioning and dehumidifiers. The CMM holding jig should also be designed to be resistant to vibration, for example, by using vibration damping materials or isolating the jig from the source of vibration.
Calibration and Maintenance
Regular calibration and maintenance of the CMM holding jig are essential to ensure its accuracy over time. Calibration involves comparing the dimensions of the jig to a known standard and making any necessary adjustments to correct for any deviations. This should be done at regular intervals, as specified by the manufacturer or based on the frequency of use.
Maintenance of the CMM holding jig includes cleaning, lubrication, and inspection for wear and damage. The jig should be cleaned regularly to remove any dirt, debris, or contaminants that may affect its performance. Lubrication may be required for moving parts to reduce friction and wear. Inspection for wear and damage should be carried out on a regular basis to identify any potential issues before they become major problems.
Operator Skill and Training
The skill and training of the operator also play a crucial role in the accuracy of the CMM measurement process. An experienced and well-trained operator is more likely to use the CMM holding jig correctly, follow the proper measurement procedures, and interpret the measurement results accurately.
Operator training should include both theoretical and practical components. The theoretical component should cover topics such as the principles of CMM measurement, the operation of the CMM holding jig, and the interpretation of measurement results. The practical component should involve hands-on training on the CMM equipment and the holding jig, allowing the operator to gain experience in performing measurements and troubleshooting any issues that may arise.
Conclusion
In conclusion, several factors can affect the accuracy of an auto door CMM holding jig, including material selection, design and manufacturing tolerances, environmental conditions, calibration and maintenance, and operator skill and training. By carefully considering these factors and taking appropriate measures to mitigate their effects, it is possible to achieve high accuracy and reliability in the measurement of auto door parts.
As a supplier of link text: Auto Door CMM Holding Fixture, we understand the importance of providing high-quality jigs that meet the specific needs of our customers. Our team of experts has extensive experience in designing and manufacturing CMM holding jigs for the automotive industry, and we use the latest technology and materials to ensure the accuracy and reliability of our products.
If you are in the market for link text: Gauges For Automotive Door Parts Manufacturer or link text: Door Parts CMM Holding Fixture, we invite you to contact us to discuss your requirements. Our sales team will be happy to provide you with more information about our products and services and to assist you in finding the right solution for your needs.
References
- ASME B89.1.12-2009, "Performance Evaluation of Coordinate Measuring Machines (CMMs)"
- ISO 10360-1:2019, "Geometrical product specifications (GPS) — Acceptance and reverification tests for coordinate measuring machines (CMM) — Part 1: CMMs using a single stylus touch probe system"
- "Automotive Manufacturing Technology: Principles and Processes" by A. K. Jain


