As a dedicated supplier of Cupholder CMM holding jigs, I understand the significance of maintaining these precision tools in top - notch condition. A clean Cupholder CMM holding jig not only ensures accurate measurements but also extends the lifespan of the equipment, saving you both time and money in the long run. In this blog, I'll share a detailed guide on how to clean a Cupholder CMM holding jig.
Understanding the Cupholder CMM Holding Jig
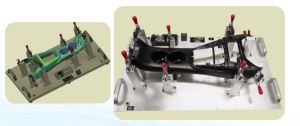
Before we delve into the cleaning process, it's essential to understand what a Cupholder CMM holding jig is. It is a specialized fixture designed to hold cupholders securely during the Coordinate Measuring Machine (CMM) inspection process. The CMM is used to measure the physical geometrical characteristics of an object, and the holding jig plays a crucial role in positioning the cupholder accurately for precise measurements.
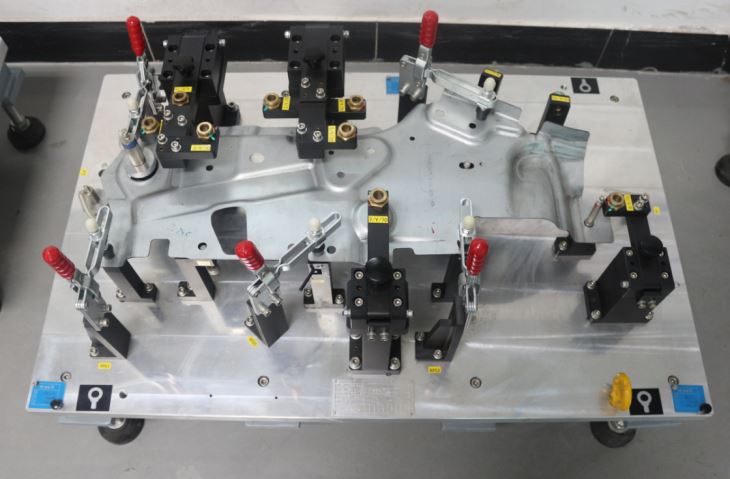

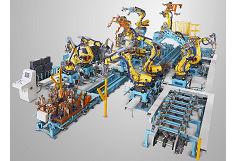
Our company offers high - quality Cupholder CMM Holding Fixture, which are made from durable materials and engineered to provide stable support for cupholders of various shapes and sizes. Additionally, we also supply Auto Metal Parts CMM Holding Fixture, which are used in similar inspection processes for different automotive metal components.
Pre - cleaning Preparation
- Gather the Necessary Tools: You will need a variety of tools for the cleaning process. These include a soft - bristle brush, compressed air canister, lint - free cloths, mild detergent, and a container for soaking. Make sure all the tools are clean and in good condition before you start.
- Remove the Cupholder: Carefully remove the cupholder from the CMM holding jig. This step is crucial to ensure that you can clean all the nooks and crannies of the jig without any obstructions.
- Inspect the Jig: Before cleaning, visually inspect the Cupholder CMM holding jig for any signs of damage, such as cracks, dents, or loose parts. If you notice any issues, it's important to address them before proceeding with the cleaning.
Cleaning the Exterior
- Blow Away Loose Debris: Use the compressed air canister to blow away any loose dust, dirt, or metal shavings from the exterior of the holding jig. Hold the canister at a distance of about 6 - 8 inches from the jig and move it around in a systematic manner to ensure that all areas are covered.
- Wipe with a Lint - free Cloth: Dampen a lint - free cloth with a small amount of mild detergent and water. Gently wipe the exterior of the holding jig to remove any stubborn dirt or grease. Make sure to wring out the cloth well so that it is only slightly damp, as excessive moisture can damage the jig.
- Dry the Exterior: After wiping, use a dry lint - free cloth to dry the exterior of the holding jig thoroughly. This will prevent any water spots or corrosion from forming.
Cleaning the Interior
- Soak in Mild Detergent Solution: Fill the container with a mild detergent solution. The ratio of detergent to water should be according to the manufacturer's instructions. Immerse the holding jig in the solution and let it soak for about 15 - 20 minutes. This will help to loosen any dirt or debris that is trapped inside the jig.
- Brush the Interior: After soaking, use the soft - bristle brush to gently scrub the interior of the holding jig. Pay special attention to the areas where the cupholder makes contact, as these areas are more likely to accumulate dirt and grease. Make sure to brush all the crevices and corners to ensure a thorough clean.
- Rinse with Clean Water: Once you have finished brushing, remove the holding jig from the detergent solution and rinse it thoroughly with clean water. Make sure to remove all traces of the detergent.
- Dry the Interior: Use a compressed air canister or a dry lint - free cloth to dry the interior of the holding jig completely. It's important to ensure that there is no moisture left inside the jig, as this can lead to rust or other forms of damage.
Lubrication and Maintenance
- Apply Lubricant: After the holding jig is completely dry, apply a small amount of lubricant to the moving parts and contact points. This will help to reduce friction and ensure smooth operation. Make sure to use a lubricant that is compatible with the material of the holding jig.
- Inspect and Adjust: Once the lubricant has been applied, inspect the holding jig again to make sure that all the parts are in good working condition. Check for any signs of wear or damage, and make any necessary adjustments.
Frequency of Cleaning
The frequency of cleaning a Cupholder CMM holding jig depends on several factors, such as the frequency of use, the environment in which it is used, and the type of cupholders being inspected. In general, it's recommended to clean the holding jig at least once a month if it is used regularly. However, if the jig is used in a particularly dirty or dusty environment, more frequent cleaning may be required.
Benefits of Regular Cleaning
- Accurate Measurements: A clean holding jig ensures that the cupholder is held in the correct position during the CMM inspection process, which leads to more accurate measurements.
- Extended Lifespan: Regular cleaning helps to prevent the build - up of dirt and debris, which can cause wear and tear on the holding jig. This extends the lifespan of the jig and reduces the need for costly replacements.
- Improved Efficiency: When the holding jig is clean and in good working condition, the inspection process can be carried out more efficiently, saving time and increasing productivity.
Conclusion
Cleaning a Cupholder CMM holding jig is a relatively simple process that can have a significant impact on the performance and lifespan of the equipment. By following the steps outlined in this blog, you can ensure that your holding jig remains in top - notch condition and continues to provide accurate measurements for years to come.
If you are interested in purchasing high - quality Cupholder CMM holding jigs or other CMM holding fixtures, please feel free to contact us for more information and to discuss your specific requirements. We are committed to providing our customers with the best products and services in the industry.
References
- "Precision Measuring Tools and Fixtures Handbook"
- "Automotive Manufacturing and Inspection Best Practices"